8 rarely spoken about tips for designing your home
/
Gaining an understanding of how an interior designer thinks and works can help you experiment with home design, and think differently about your layout.
The trouble is, too few guides online show you actionable advice. Yes, you see the room results and a few mediocre tips, but nothing about the decision making and what order things were done in.
In this guide, I’m going to share with you the home decoration tips I practice daily as an interior designer, to support those of you who are currently designing a room.
I hope these tips help you, but by all means come and further your knowledge on design in my online home design course. Keep reading for actionable points you can apply to your design plans today, which will edge you closer to making confident decisions for your home.

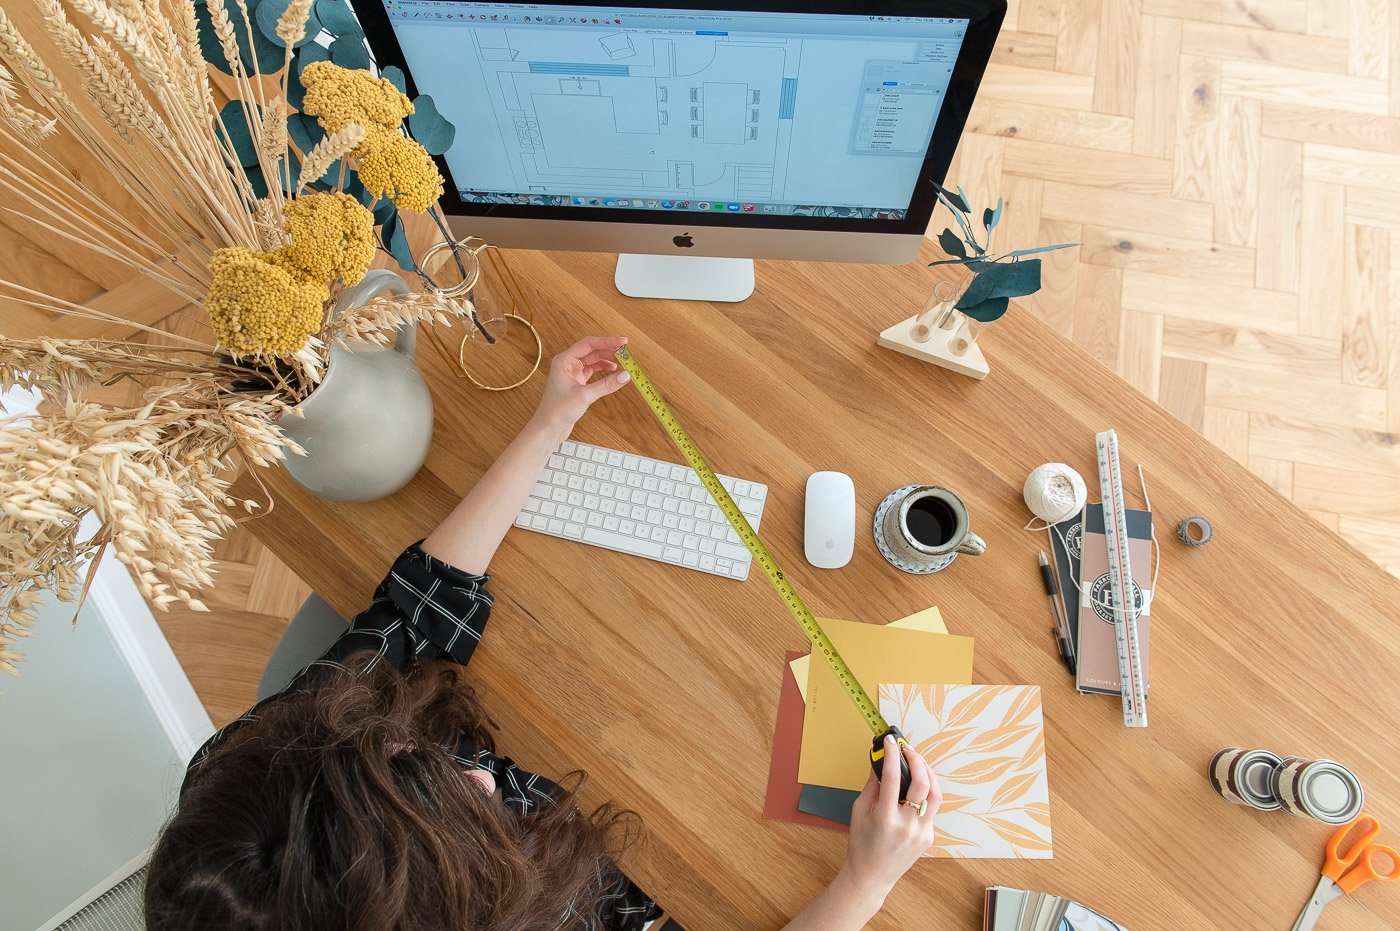
IMAGE FROM: These three rooms
Tip #1: Make your lighting decisions first
Start your design plans thinking about lighting. Natural light as well as ceiling lights, floor lights, wall lights and the rest. Too often I see renovators and home decorators consider lighting too late, or worse, disregard it completely, then add a few lamps here and there after finishing the room thinking it’ll be OK, but having to forever live with pesky wires on show. Optimise natural light first, by adding skylights, large windows and glass doors where you have a bigger budget, or invest in non-obstructing window dressing, mirrors and reflective surfaces for smaller revamps.
Why think about lighting first? Because when it comes to the crunch on electrical planning, if you want a professional look you need to have your lighting scheme complete well before electrics begin – don’t leave it to the last minute.
Not planning to have electrical work done in some rooms? There are ways around retrofitting lighting if you aren't keen on the dust and expense of rewiring. Our living room light fittings post will share some examples.

Tip #2: Clarify what you will splurge and save on – early on
You really need to spread your budget wisely for the best results. In my experience, investing in the big ticket items that make up 50% of the visuals of the room, such as a sofa, flooring, worktops or large pieces of furniture is wise.
Save on the smaller items such as rugs, lamps, mirrors and home accessories. Clarifying how you’ll spread your budget will give you a higher impact transformation.
Fed up with your living room because your sofa is tatty and dated? Happy with your furniture but your floors have seen better days? New cushions, a new mirror and a new rug will breathe life back into the room but the higher impact transformation is achieved when you invest in replacing the larger areas first and work on the finishes later. If budgets are an issue it's well worth saving for the updates that will make an impact rather than settling for second best. Chip away at the overall look and buy piece by piece. It might take longer to finish but you will be far happier with the results and your home design will give you such a positive mentality.

Our student Zoe, putting visualising techniques in practice (She’s @temposreno on Instagram)
Tip #3: Create tangible visuals before you invest
One of the hardest things to do when you're designing a room and investing money into a house is to visualise your options. If you knew exactly how things would look you'd make decisions a lot faster, and a lot more confidently, right? I have so many techniques for visualising design ideas that I share in Home Design Lab.
A quick way to play with ideas, is to take pics and just draw! One of our students Zoe does this really well (pic of her kitchen ideas above). Doodle and play with photos using paint apps on your phone. And of course, live in the property for a while so that you can get a feel for the house and sit on your ideas. It's amazing how quickly ideas can develop and change when you start work and see the possibilities coming to life, but you don't really want to be shifting the goal posts around mid-way if you can help it. It may cause delays to projects and increase costs.
Tip #4: Create 2-3 vignettes (minimum) in each room
I remember when I first learned what a vignette was many years ago from fellow home design bloggers in a private Facebook group I was a part of. Back then they taught me that a vignette in interior design is a 'view' with a styled piece of furniture wall art, shelving etc that produces a focal point (or many focal points) in a room and now it’s something I factor into every room I’ve decorated since.
So imagine this. You are taking photographs of your home for a magazine article, which angles would you shoot? Would there be only one ‘money shot’ or several? What would be included in the shot? Thinking about creating vignettes when you come to tackle your interior design can help you make the most of the room and get you thinking beyond only the furniture, wall art and flooring. As a photographer and designer, we try to bring in several vignettes in each room and plan to create more using shelving, accessories, plants, floor lamps not just relying on our furniture to create the design. They add such interest and personality.

Tip #5: Contrast your textures
This is one of my favourite tips I learned through trial and error with my own home as well as advising people on how to enhance their room decor (clients, friends and family). It's amazing what mixing textures brings to a space. When you buy juxtaposing materials for your home (for example, hard floors with soft rugs, textured baskets with smooth painted furniture) you create visual layers which warm up a space. Putting this tip into practice is easy but often requires a little bit of budget management. Every living area needs a rug (don’t believe me, just try it! Return the rug if you don’t love it) – which can be upwards of £100+ depending on the size, throws, cushions, soft window dressing and fabrics which can also be quite costly. We have a blog post sharing affordable rugs to give you ideas but ultimately, you need to budget for the things that bring in wow factor. Trust me, contrasting your textures brings a new level of warmth to a room. What can you bring into your room to contrast the materials?
Tip #6: Think in a non-linear way
This tip applies specifically to anyone planning a kitchen extension or loft conversion but it can help renovators think outside the box with other rooms they're transforming. Too often, we play safe with the structure of our homes but, if we're working with an architect anyway, we have the opportunity to make the shape of our extensions unique. Put simply, we don't have to go with a basic square or rectangular extension popped on the back of the house. Take a look at this example…
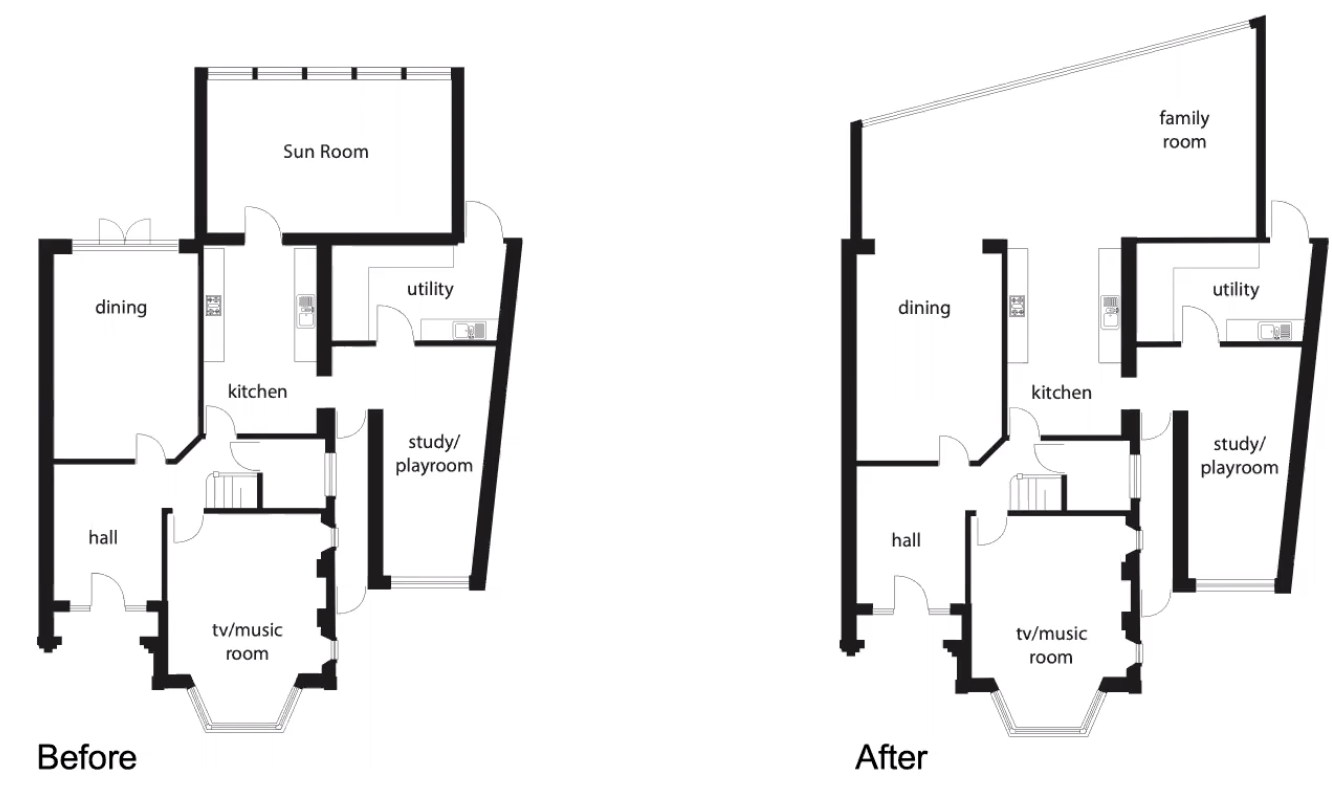

BEFORE

AFTER
This tip came to me when I saw an amazing extension (above) that was built to be in harmony with the view towards the back of the house. On the left as you looked out from the old sun room, stood a beautiful church and view of the countryside. The generic solution would have been to build a rectangular kitchen extension facing outwards but instead, the architect chose to angle the extension to emphasise the view from the inside. It's unique, it's in harmony with the house and the surroundings, and it’s stunning! I bet the flooring fitter was swearing, mind you!
Tip #7: Recognise the design that excites you
Pinterest is an amazing tool for ideas about how to design a house but it can be a little bugger when you can't decide which designs you love most, you want them all. It's why I tell Home Design Lab members to ignore Pinterest until they complete module 1. We do excavation work to unearth an interior style that really speaks to them (not trends). Looking at Pinterest before understanding the style you are focussing on for your home is a recipe for magpie tendencies.
Some soul searching is required to identify what really speaks to you and gives you a positive vibe. I start every project this way, and it results in a home design that speaks to my clients.
Ultimately, your home needs to be filled with colours, shapes and accessories you love so that it enhances the way you feel every day and since we all have very different tastes, it's important not to follow trends and instead try to identify what makes you happy. In Home Design Lab I guide people through specific exercises that goes deep on their design preferences. Students have found it eye-opening; they've learned about themselves and their tastes during the process and importantly, they are now designing their homes with a very clear vision that aligns with who they are. And guess what else? Soul searching is fun. Find your style and own it.
8. Play with height, scale and space
Just the same as applying different textures to layer the room you're designing, it’s also important to make good use of height and scale.

IMAGE: ARCHITECTURAL DIGEST
Being able to choose the right height and scale items for a room is very hard to teach. It comes with experience and an eye for measurements… but it starts with you choosing furniture that is the right measurements for a room in terms of height, width and depth. Sounds simplistic I know, but when I asked my Instagram followers what design mistakes they've made recently the most common mistake was not measuring new purchases correctly. When the scale is wrong, the whole flow is wrong. I'm no angel at this either, I've made my own mistakes wanting to hold onto furniture that just doesn't fit simply because I love it, but it's not doing your home or life any favours.

IMAGE: APARTMENT THERAPY

Conclusion
That’s just the tip of the iceberg. Come over to Home Design Lab where I’ll help you deep dive into Design + Styling your home.
If you’ve ever been curious about working with a designer for your home, this course will reveal exactly how to approach your project like a designer would.
I hope this post has shared with you some unique ways interior designers think and how you can apply some of what I’ve learned through the years to your own home decoration or renovation project.
Thanks for reading!
Fi xoxo